
Groups are on the second (middle) level of the three-tier system used to manage users and groups in edu-sharing.
Examples for groups in an educational setting could be a group for all teachers, for all students of a class or for all members of the administrational staff of a school.
Groups are the tool of choice to facilitate managing access rights for functionalities, folders or objects. In our example an administrator could create a "teachers" group and give the group acess to a folder instead of granting that right to every single teacher.
Or the admin could grant reading rights to all students of a class but only editing rights to the teachers and so on.
The system administrator and members of the organization administrator group can create any number of groups within an organisation.
For each organization the system will automatically create:
-
an organization group for all future members and groups of the organization
-
an organization administrators group (as a child of the organization group)
The assignment of members to groups is usually done by system or organization administrators or by synchronizing edu-sharing with external systems for user management.
Since version 6.0, it is still possible to open groups for self-registration by users.
This article deals with the management of groups. In the article about user management you will learn how to assign users to your groups.
on this page:
Creating Groups
In order to create a group within an organization open the organizations tab of the permissions tool and select the desired organization. Now switch to the groups tab of your organization.
The name of the currently selected organization will be displayed in brackets on top of the groups tab.
opening the groups tab of an organization
On top of the right hand side you will find the button to create a new group.
Clicking the button will open a new interface asking you for a group name, an email a group type and visibility settings.
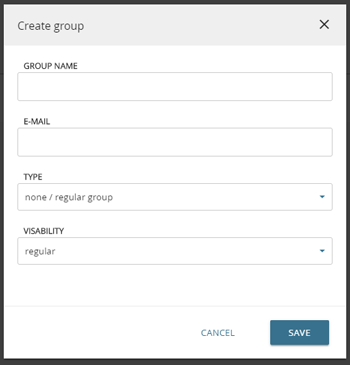
The group name should be picked avoiding duplicates.
The e-mail is used for notifications concerning the group e.g. when the group receives permissions to a folder or an object. Only this address will be used for notifications on a group level - there will be no notifications for members of the group.
There are 3 types of groups that can be created:
-
no special type / regular groups - use these groups to organize users without assigning additional rights right away
-
admininstrator-group - these groups will be created when adding an organisation. Members of this group can manage the containing organisation.
-
editors group - these groups can be assigned as keepers to the editorial collections. Several editorial groups can be assigned to an editorial collection.
The visability setting is used to determine whether the group can be found across the borders of repositories in the case of a repository network.
Make your pick, enter a name and use the "SAVE" button.
Editing Groups
System administrators and members of the organization administator group can change the name, email, type and visibility of groups.
To change the name or type of a group open the groups tab in the permissions tool. Open the context menu of the desired group and pick the "edit" option.
Choosing the type of group enrollment
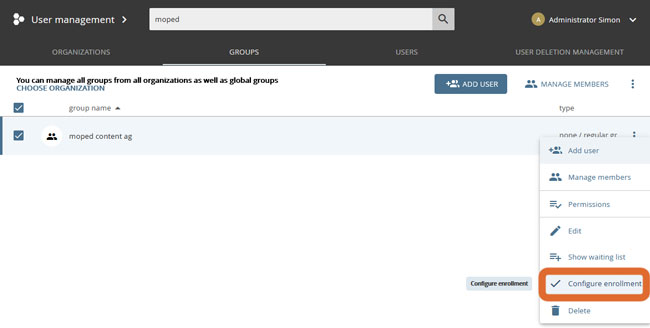
Since version 6.0 it is possible to open groups for self-registration by users. The configuration for this can be found in the "Groups" tab of the user administration.
Use the search to find the desired group and open the context menu. Select the "Configure enrollment" option.
There are 4 options available for self-enrollment:
-
no self-enrollment (default): users cannot enroll in the organization/group on their own, but must be added manually by an administrator.
-
Enrollment without restriction: users can enroll themselves into the organization/group and become members immediately.
-
Enrollment with password: Users can independently enroll in the organization/group and become members immediately if they know the correct password.
-
Enrollment with waiting list: Users can enroll in the organization/group on their own and will be placed on a waiting list. An administrator must then confirm the enrollment. The group administrator will be informed about the enrollment request by mail. If the waiting list is selected as an enrollment option, the context menu will be expanded by the option "Show waiting list" entry. Users can then be added to the group using the waiting list.
The type of enrollment can be changed at any time.
Deleting Groups
System administrators and members of the organization administator group can delete groups.
Deleting a group will only result in the removal of the group. No accounts of users which were a member of the group will be deleted.
Keep in mind, that users will lose the access rights to objects or folders they were granted by means of membership of this group.
To delete a group open the groups tab in the permissions tool. Open the context menu of the desired group and pick the "delete" option.