Sharing Objects & Folders with a Link
Creating shared links
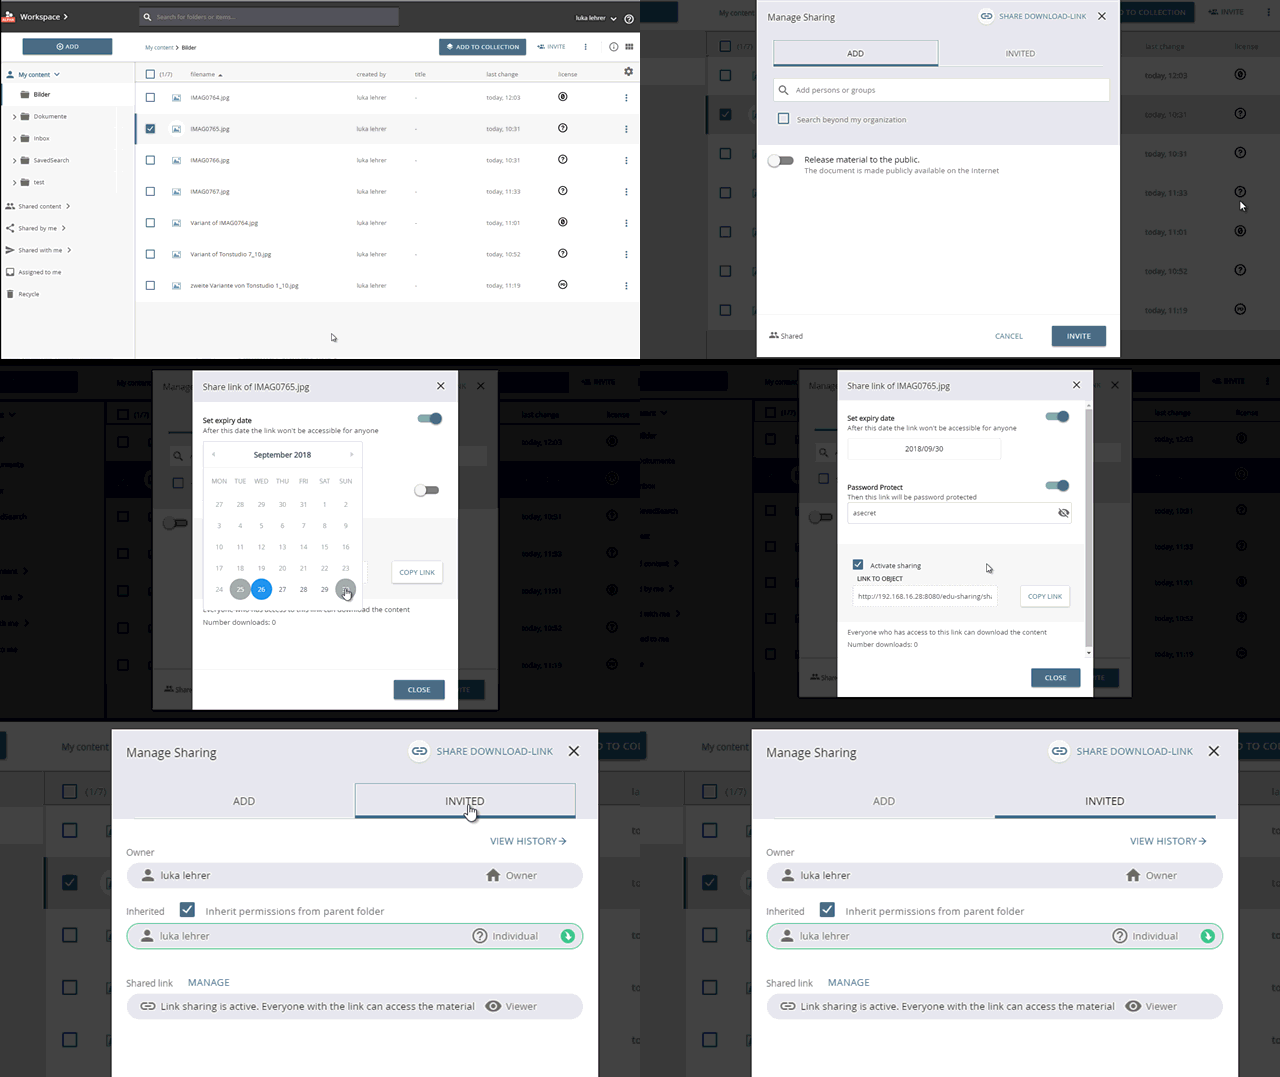
A shared link is created in the Workspace view of the edu-sharing web app.
Open the context menu for the corresponding object and select the "Invite" option.
The sharing dialog opens. In the upper part of the view you will find the button "SHARE DOWNLOAD LINK". Click on the button.
A new window will open.
The date limit for the link can be activated with the help of the button in the upper screen area.
Use the calendar icon to select the expiration date.
Below the date restriction you can activate and use the password protection.
In the "Link to object" area you will find a check mark for activating and deactivating the link.
With the help of the "COPY LINK" button, you can copy the release link to the clipboard in order to paste it into an e-mail or Messenger message, for example.
At the bottom of the screen, you can see the number of previous downloads / views of your object via the release link.

creating a download link and checking for it in the "INVITED" tab
Editing shared links
Active shared links are displayed in the "INVITED" tab of the "invite view". The "MANAGE" link allows you to edit the shared link.
Make your changes to the expiration date or password and close the window.
Deleting shared links
Active shared links are displayed in the "INVITED" tab of the "invite view". The "MANAGE" link allows you to de-activate the shared link.
To do this, simply remove the "Activate sharing" check mark and close the window.
