shared files (group folders)
About the "shared files" node
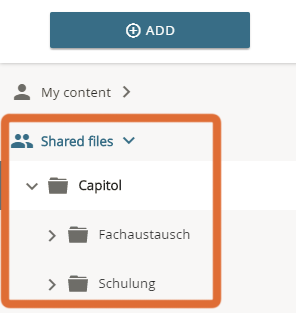
In order for a user to be able to use the "Shared files" area, he or she must be a member of at least one organisation group to which an organisation folder has been assigned.
In the edu-sharing context we also call these groups "edu-groups".
In the school context, the organization folder often bears the name "My School" or the name of the educational institution. The organization group includes all users of an organization.
The organizational folders are located just below the "shared files" node. Users who belong to more than one organization (for example, a teacher who teaches at two schools) can find two or more organization folders.
Below the organization folder users with appropriate rights can create more group folders, such as a folder for a school class in which all members of the "teachers" group can create new objects, but the group of learners has only read access.

"shared content" node with organisation folder "Baumschule"
and additional group-folders below
How do I enroll myself in a group?
Administrators have the option to open groups for self-enrollment. This allows users to make themselves a member of a group.
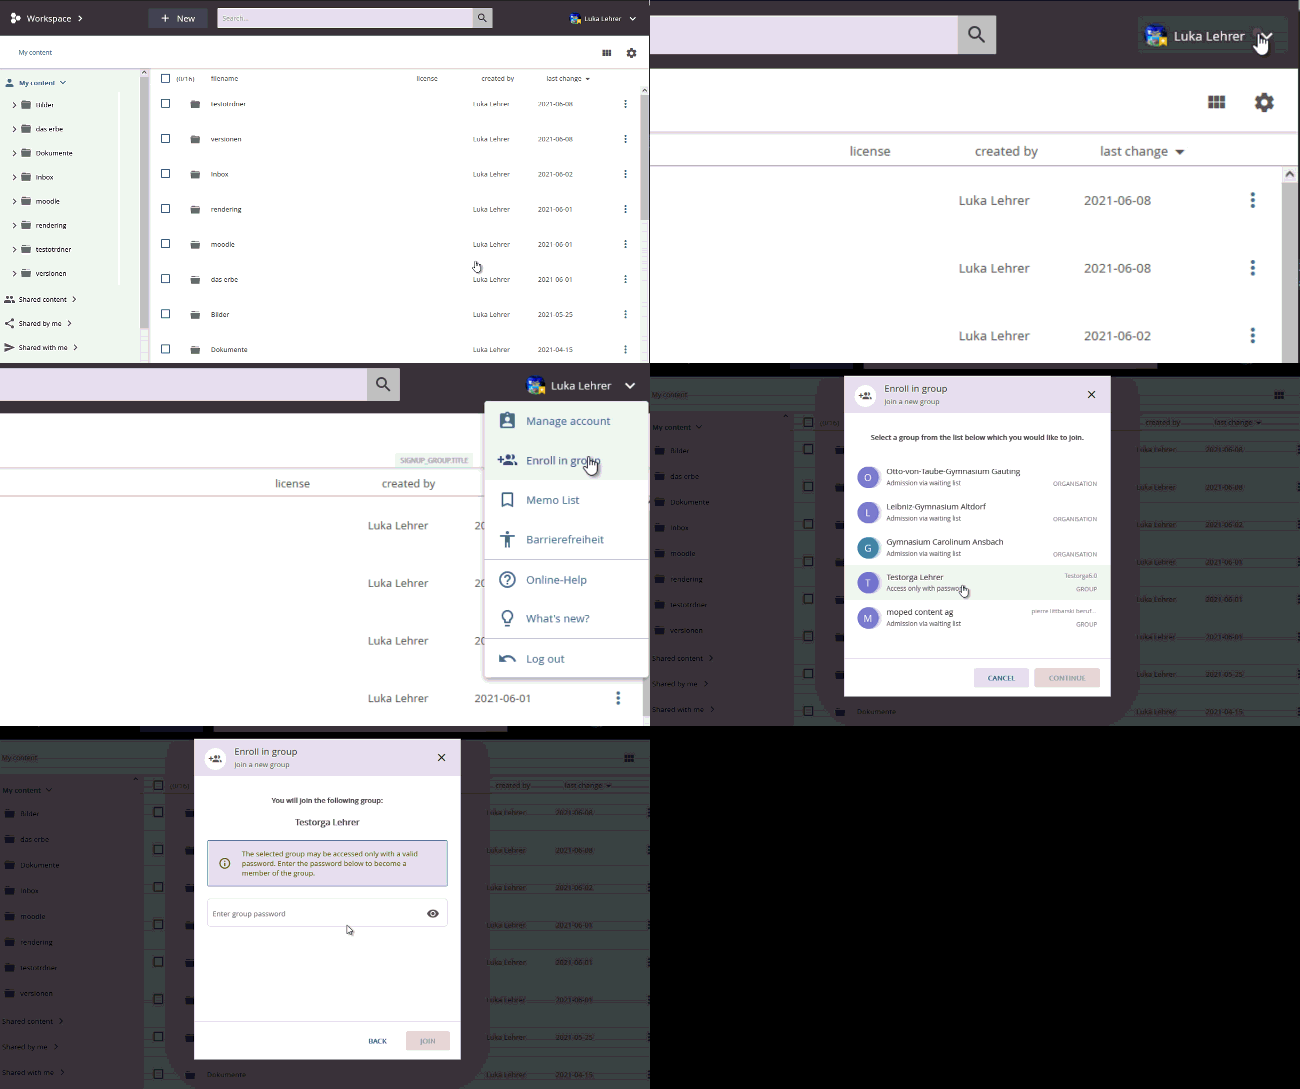
The enrollment is done with the help of the user menu.
- Open the menu.
- Select the "Enroll in group" option.
- Select the desired group and click "CONTINUE". The type of enrollment for the group is displayed below the group name.
edu-sharing offers three options for self-enrollment:
- Enrollment without restriction: users can self-enroll in the organization/group and become members immediately.
- Enrollment with password: Users can enroll themselves in the organization/group and become members immediately if they know the correct password.
- Enrollment with waiting list: Users can enroll in the organization/group on their own and will be placed on a waiting list. An administrator must then confirm the enrollment.
The group administrator will be informed about the enrollment request by mail. If the waiting list is selected as an enrollment option, the context menu expands to include the "Show waiting list" entry.
Users can then be added to the group using the waiting list.

Using “shared content” in the workspace
You can find the "shared content" node in the tree structure of the workspace.
Navigation within the “shared content” folder works just like in your home folder area.
The workspace offers the most options for 'shared content ". You can create meta data inheritance and assign access rights to folders.
A special feature of the folder in the “shard content” area is that the access rights for the basic structure will usually be assigned by an administrator. That is why you may have fewer rights for folders and objects than in your private folders.
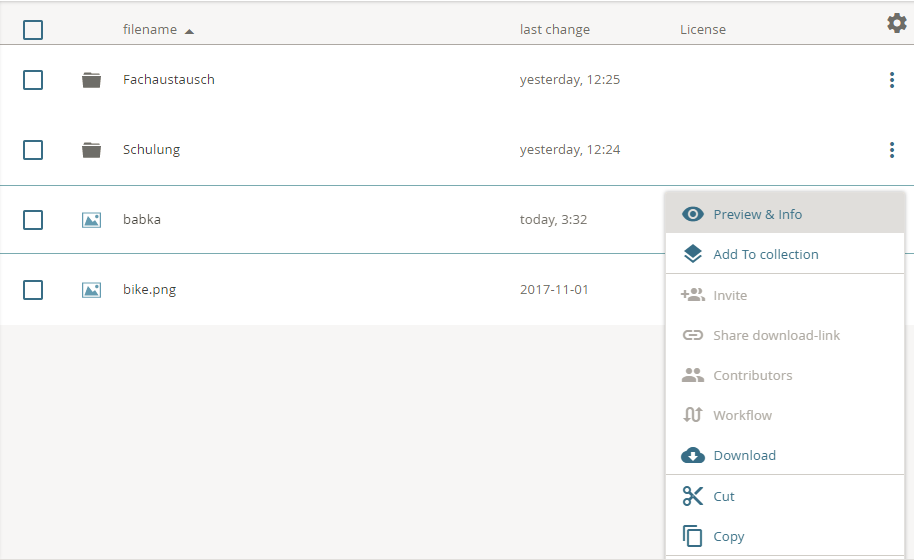
You can check your permissions for a folder or an object by calling the context menu for it in the workspace.
All operations that can you apply to the object are displayed in an action color. This color may differ depending on your organization / installation. Functions that you may not use are grayed out.
The user may only preview, downolad, cut, cop or add the object to a collection in the shared content node
In order to create sub folders in the shared content area you have to have at least “collaborator” permissions for the superordinate folder. Make sure you know about the inheritance of rights in edu-sharing.
using shared content via WebDAV
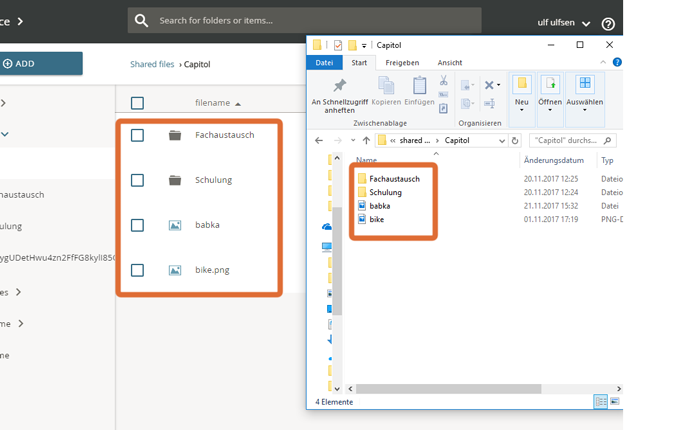
Shared content can also be used via WebDAV. This allows you to directly open content in Microsoft Word, make changes and save the object again without downloading and uploading it again.
A special feature of the folder in the “shard content” area is that the access rights for the basic structure will usually be assigned by an administrator. That is why you may have fewer rights for folders and objects than in your private folders.
The easiest way to check you permissions is by having a look in the workspace. Read all about it in the chapter about using “shared content” in the workspace
In order to gain access to the shared content via WebDAV, connect your computer to the edu-sharing repository.
You will find the area under the folder name "shared content". The navigation works just like you are used to from your Mac Finder or Windows Explorer.
connected WebDAV drive with opened shared content node


