
Installing edu-sharing using Docker [Original Seitentitel]
Prerequisites
Make sure you have docker and docker compose installed on your machine.
Please refer to the official installation instructions available online.
Get edu-sharing
Open our artifacts repository at https://artifacts.edu-sharing.com/
Open the folder "maven-remote" and find "edu_sharing-projects-community-deploy-docker-compose".
Here you can find all versions you can use for deployment.
For our example navigate to 7.0.1-RC0 and expand the node.
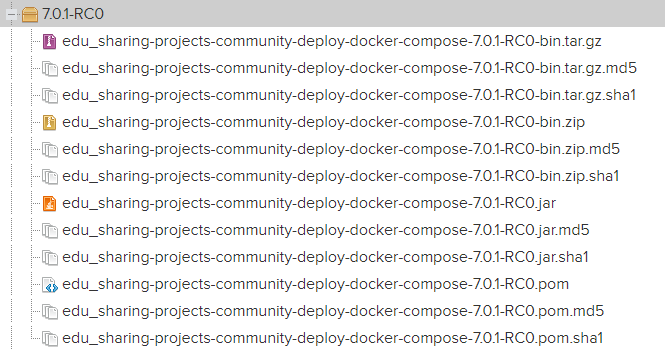
Select the "bin.zip" line to open its summary field on the right.
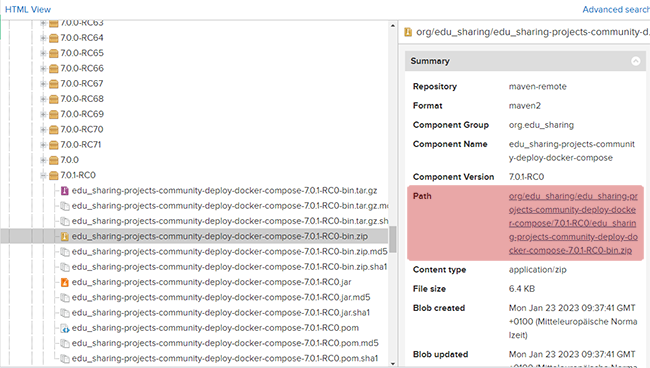
Click on the Path in order to download the Zip.
In the compressed file you will find:
-
an env.sample
-
a readme file
-
a docker-compose.debug.yml
-
a docker-compose.yml and a
-
utils.sh.
Unpack the files and move them to your designated edu-sharing folder.
Enter "docker-compose up -d" on your machine and let the magic start.
How to configure the installation
If you need to make changes to our default installation (e.g. special port settings), make a copy of the "env.sample" file and rename it simply "env".
Open the file in your editor and make the desired changes.
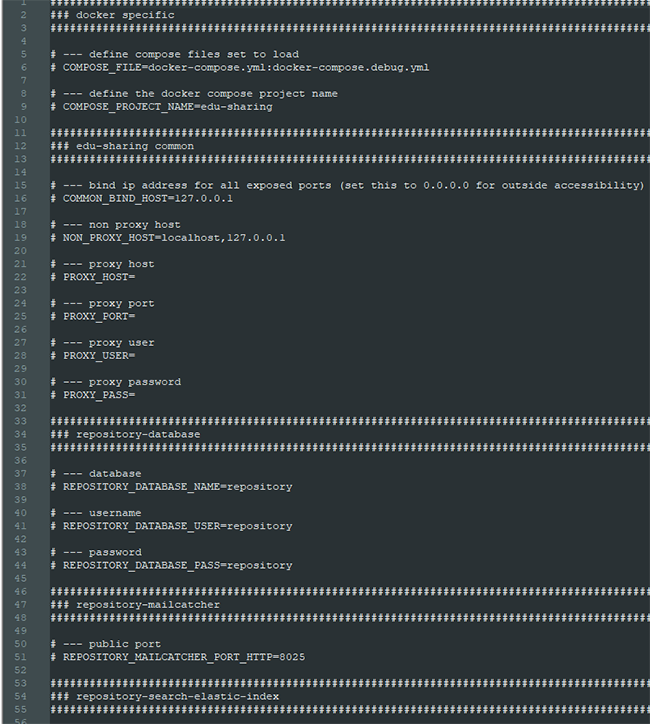
So if we wanted to change the public port we would have to change:
# --- public http port
# REPOSITORY_SERVICE_PORT_HTTP=8100
to
# --- public http port
 REPOSITORY_SERVICE_PORT_HTTP=myport
Another typical change would be to change
# --- public domain
# SERVICES_RENDERING_SERVICE_HOST=rendering.services.127.0.0.1.nip.io
to
# --- public domain
# SERVICES_RENDERING_SERVICE_HOST=localhost
since some routers do not like using nip.io .
The same applies to:
# --- public domain
# REPOSITORY_SERVICE_HOST=repository.127.0.0.1.nip.io
If you want your public port to work without specifying the port number, you will need to change
REPOSITORY_SERVICE_PORT_HTTP and REPOSITORY_SERVICE_PORT to 80.
Now you can access the system at localhost/edu-sharing.
That was it - we told you it was easy.
Additional tools
The utils.sh file contains some additonal tools you can use to work with the container.
Use it by typing ./utils.sh followed by a whitespace and your desired tool/command:
-
start [Service...] starts the according containers
-
restart [Service...] stops and starts containers
-
info shows the repository information
-
logs [Service...] shows the logs
-
ps shows the containers
-
stop [Service...] stops all containers
-
remove removes all containers
-
purge removes all containers and volumes
-
terminal [service] opens a container bash as root