edu-sharing allows access to the repository via WebDAV. This way you can use edu-sharing as a network drive and edit content in the repository without downloading it.
Open documents directly using the authoring software of your choice (e.g. Word) and store your changes in edu-sharing. The version management automatically creates a new version of your document.
This article describes the configuration for Windows PCs and Macs.
Connecting a Windows PC to edu-sharing
In order to connect your PC to edu-sharing you will first need the WebDAV adress of your system. Your administrator should be able to help you.
In most cases the path will look like this: https://www.my-adress/edu-sharing/webdav
In test cases the path will look like this: http://www.my-adress/edu-sharing/webdav
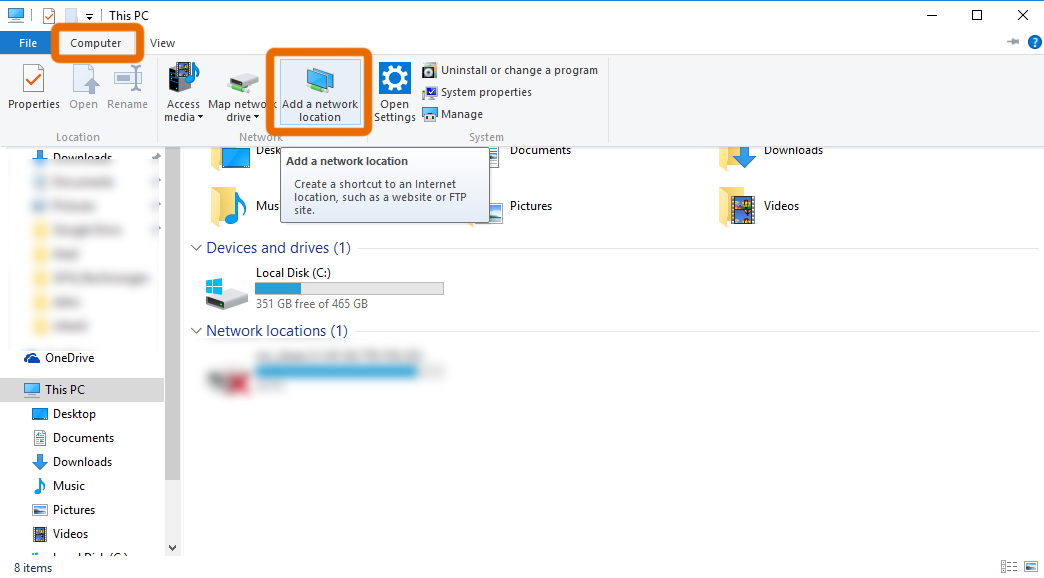
Open your Windows Explorer. Go to "This PC". Now Click on the "Computer" tab in the upper left corner of the window and select "Add a network location".
A new window with some pointers opens.
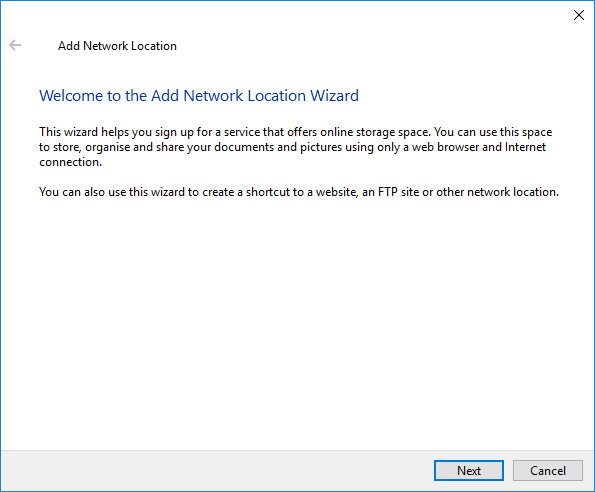
Click on "Next". Another window opens.
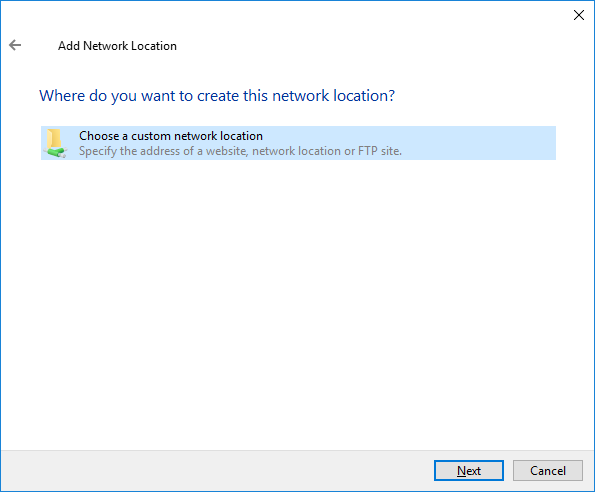
Click on "Choose a custom network..." and click on "Next".
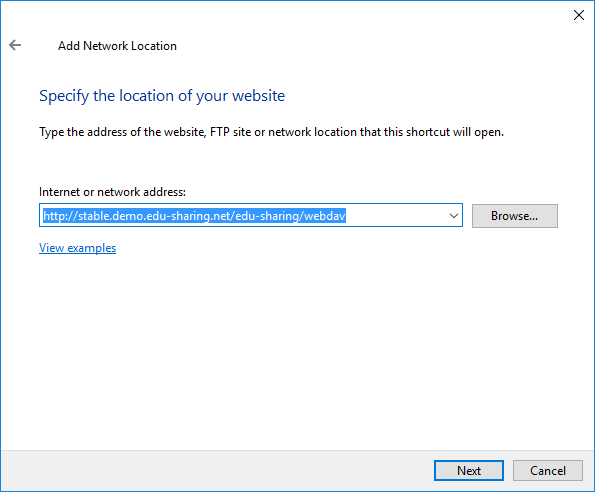
Enter the WebDAV adress and click on "Next".
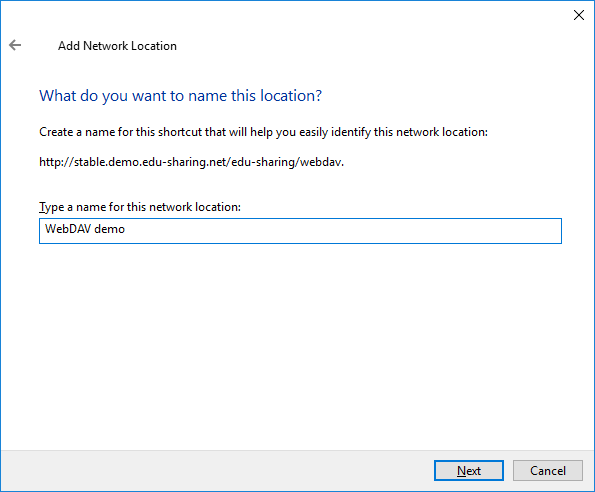
Enter a name for the connection. This will be the title of your edu-sharing connection in your Windows Explorer.
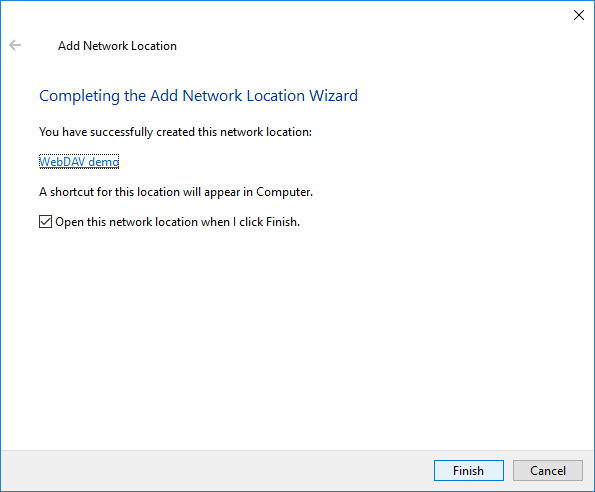
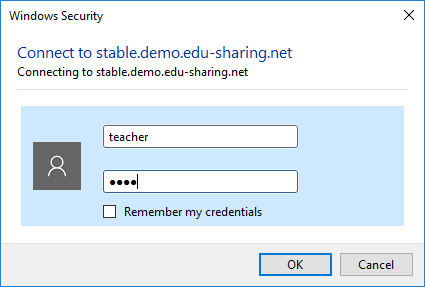
Enter your credentials to log in. And thats it!
Please note that Windows does not allow WebDAV connections to servers without an SSL certificate.
Connecting a Mac to edu-sharing
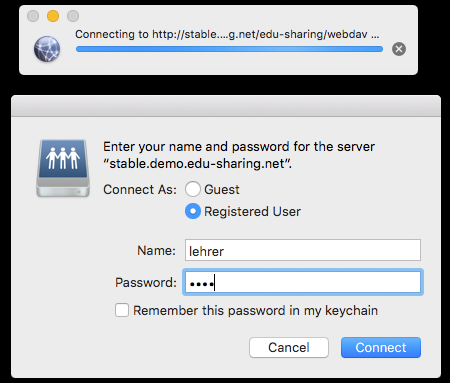
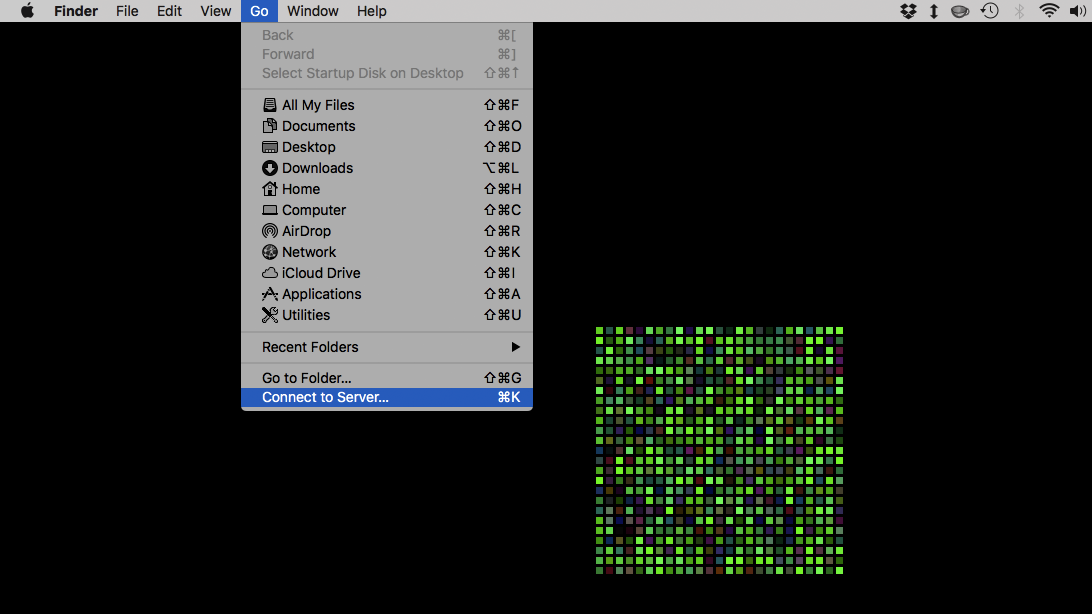
Click on "Go" in your Finder and select the option "Connect to Server"
In the Pop-Up enter the server-adress an click on "Connect".
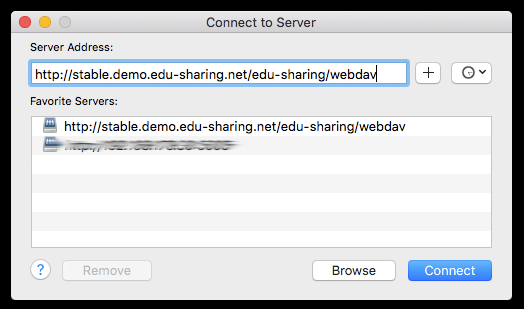
Enter your credentials and start using edu-sharing via WebDAV.